Everything you need to know before doing this incredible ride on your own.
Table of Contents

How to Get There
Odds are if you’re reading this, you already know how to get there and are most likely coming from Hanoi or Sa Pa. Both have buses going directly to Ha Giang, use 12go.asia.
❕ Tip: Arrive at least one day before with enough time to get everything you need sorted - no later than 4pm is our advice.

Tour vs DIY
Many people opt to take an EasyRider tour to make things easier and leave the planning to someone else. If you are not comfortable riding a motorbike, this may be the choice for you. But if you are on the fence, we had a fantastic time doing it ourselves. Just make sure you have a bit of motorcycle riding experience. If you don’t, another good option is to rent the bike a day or two beforehand and get some practice runs in around Ha Giang - even more so if you do not have experience with a semi-automatic motorbike.
Tour Pros + Cons
| Pros | Cons |
|---|---|
| No riding experience required | A significant investment |
| Local insight from tour leader | No flexibility in itinerary |
| No interaction with police | Tour groups can have 60+ people |
| Meet new people | This is a “party loop” |
| No planning required | Language barrier with guides/drivers |
DIY Pros + Cons
| Pros | Cons |
|---|---|
| Less touristy spots | Can be dangerous if riding carelessly |
| Can get popular spots to yourself | Strongly recommended to get a semi-automatic motorbike |
| Go at your own pace | More planning required |
| Significantly cheaper (however more likely to get fined) | Less photo opportunities while on the bike |
| Cultural immersion | Will be very tired at the end of the day/loop |
How Many Days
There are three length options to choose from when doing the Ha Giang Loop:
- 2 days, 1 night - if you only have an extremely short amount of time, but this option is honestly not worth it
- 3 days, 2 nights - best if you are in an EasyRider tour, or for those on a very tight budget
- 4 days, 3 nights - overall the best option, allows you to really enjoy the ride and the sights
We chose to do it in 4 days and 3 nights since, as somewhat inexperienced riders, we thought it would give us a chance to go at our own pace, and really experience all that the loop had to offer. We found that we were 100% right!
Motorbike Info
When renting a motorbike to complete the Ha Giang Loop, you have two options: semi-automatic or fully automatic. Most people (including us) will recommend that you get a semi-automatic, since it combines the benefits of a manual motorbike with that of an automatic.
A semi-automatic bike cannot stall, like an automatic, but it allows you to select which gear you want to use, like a manual, perfect for going up and down all the hills on the Ha Giang Loop. The ability to change gears also allows you to engine brake while going down steep hills.
If this will be your first time riding a motorbike, make sure to check out some YouTube videos on changing gears, engine braking, and how to make minor repairs.
We recommend getting a Honda Blade, which is a 110CC, semi-automatic bike. It is rated for 160kg, something to keep in mind if you plan on putting multiple people + gear on the bike.
Rental Options in Ha Giang
We rented from QT Motorbike, but there are many other reputable shops out there. Do a quick search on Google Maps and check for good reviews:
- It cost us 180,000 VND per day (in 2025)
- Plus, 80,000 VND per day for insurance (which we recommend for peace of mind)
- You can find all the bikes on their website, and they also have an online reservation system
- They will give you GIGANTIC plastic bags for your backpack, and a free poncho
❕ Tip: Don’t forget a helmet that fits properly! Take your time when picking one out since you are pretty much stuck with it after you leave. Check out Style Motorbike if you need an option in Ha Giang.
❕ Tip: Petrolimex gas stations usually have English speaking attendants, and they all take credit card!
Police
One of the negatives of DIYing the Ha Giang Loop is that you will most likely interact with the local traffic police. Vietnam requires foreign drivers to hold an International Driving Permit (IDP), and it must be from 1968, anything else is not valid. The IDP allows you to legally drive in Vietnam. If you do not have one, the police may issue fines, and you could be asked to stop driving.
⚠ Warning: Unfortunately, we are not lawyers, and so this information can not be considered counsel or legal advice.
There are checkpoints along the Ha Giang Loop, where police may stop you to check for documentation, including your IDP. These checkpoints are commonly set up just outside of larger towns and cities, and are usually only manned between 8:00 AM and 5:00 PM, with (sometimes) a break for lunch between 12:00 and 1:00 PM. They also usually have white police cars parked outside, and some are equipped with strobe lights.
Here are some tips if you do encounter the police:
- Hide any extra cash, only keep around 2,000,000 VND
- Have a couple of photocopies of your passport in case they ask for it
- If you have a Ha Giang Permit, display that as well
- If you get fined, make sure to get a receipt - they are usually a pamphlet with the date scribbled on it
If you are stopped, you will likely be asked to pay a fine (bribe). They will tell you that the fine is a maximum of 6,000,000 VND, but if you argue for a while, they will usually bring it down to roughly 2,000,000 VND. They can also impound the bike for 10 days if you do not have the money. We did hear some reports that depending on the power level of your bike, they may raise or lower the fine arbitrarily.
❕ Tip: Always wear a helmet, as it is required by law in Vietnam - you will notice considerably more people wearing helmets in the big cities due to this law.
What to Bring
- Motorbike
- Helmet: make sure it fits well
- Clothes that layer (including, but not limited to):
- Base layer top and bottoms
- Sweater
- Rain jacket
- Thicker pants: we don’t recommend riding in shorts, even in the summer
- Gloves: necessary in the winter
- Rain Pants/Poncho: it can get wet at any time, also bring spares
- Towel
- Bathing Suit
- Toiletries
- SUNSCREEN: even if it’s cloudy
- Charger(s): don’t forget this
- Power Bank: you will need it if using your phone for GPS
- SIM Card: both Vittel and Mobifone have enough coverage, but Vittel’s is near perfect
- Water Bottle with Filter: optional, but handy
- First Aid Kit
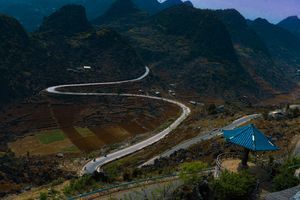
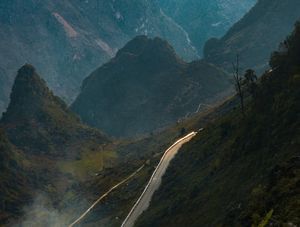
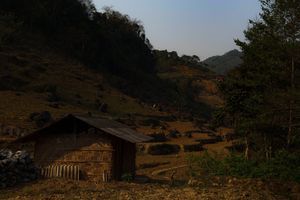
The Route
Day 1 - Ha Giang to Yen Minh
83km, plus 53km for detours
- Tham Luong Cave - lights on at 9am
- 5km detour
- 30,000 VND entry per person
- 20-30 minutes
- Bac Sum Pass - there was a police checkpoint after this
- Khau Lan Waterfall
- 15 minutes detour
- Free
- 45 minutes
- Google Maps directions work well
- Heaven’s Gate
- Fairy Bosom Lookout - great spot to use a GoPro or drone
- Lookout on the side of the road
- Free
- Lung Khuy Cave
- 20 minutes detour
- 30,000 VND entry per person, 5,000 VND to park bike
- 2km hike up, 1.5 hours
- Arrive in Yen Minh
Day 2 - Yen Minh to Dong Van
46km, plus 52km for detours
- Chin Khoanh Ramp
- Lookout along the road
- Free
- 5 minutes
- Lung Cu Flagpole - very popular, so try to arrive early
- 10km detour
- 40,000 VND per person
- 30 minutes
- Only go if it is clear, the flag is not always up
- Northernmost Point of Vietnam
- 10km detour
- Free
- 1.5 hours
- The Google Maps directions are wrong, make sure to take the route through the town of Xeo Lung
- Dong Cao/Dong Van Viewpoint
- 1km detour
- Free
- 5 minutes
- Arrive in Dong Van
Day 3 - Dong Van to Du Gia
98km, plus 10km for detours - this is the most difficult leg of the trip, but is also the most iconic.
- Ma Pi Leng Pass - aka “Death Road”
- Along the route
- Free
- 1 hour
- You are allowed to ride scooters on the road, regardless of the sign
- The scenery is very beautiful, but if you are not confident enough to ride it, just walk
- We walked it, and honestly it was better since we had more time to take photos
- Mỏm Đá Tử Thần - aka “Death Rock”
- On the Ma Pi Leng Pass
- Free
- 30 minutes
- Go early, this is the most iconic photo on the loop
- Skypath - great place to bring a drone
- Hiking trail accessible via Death Road
- 3km one way, 6km round trip
- Free, parking is 5,000 VND per bike
- 1.5 hours to hike
- This is a beautiful hike, make sure to bring your camera
- Arrive in Du Gia
- The road between the Skypath and Du Gia is not well maintained, be extremely careful for potholes
Day 4 - Du Gia to Ha Giang
72km, plus 10km for detours - avoid DT176 south of Du Gia - there are reports of the road being horrific.
- Du Gia Falls 1
- Can park right at the falls
- Free
- 30 minutes
- Do not follow the Google Maps directions, follow the tour groups, or check out this review on Google Maps
- Du Gia Falls 2
- Access from the same parking lot as Du Gia Falls 1
- Free
- Additional 30 minutes, plus time for swimming
- Check out this review on Google Maps for directions
- This is a much more private place to swim
- Aboong “Secret” Waterfall
- 4.5km ahead of the Aboong Waterfall
- Free
- Not so secret anymore, the tour groups now stop here
- 5 minutes
- There is no coverage here from either Vittel or Mobifone
- Aboong Waterfall
- Along the route
- Free
- 30 minutes
- Great place to get a video jumping into the waterfall
- There is no coverage here from either Vittel or Mobifone
- Little Ma Pi Leng Canyon
- Along the route
- Free
- 5 minutes
- Great place to stop for photos, if you want to do a cruise, do the half tour since it is cheaper
- Arrive in Ha Giang
- If you have extra time, you can visit the Waterfall near Ha Giang
- Or, the Ha Giang Viewpoint
❕ Tip: Another blog you can check out (and that was super useful in our planning) is TheBrowneTown’s Complete Ha Giang Loop Guide.